The Best Creme Brulee

I’ve made this recipe several times now and it truly is the best recipe.

http://www.chelseasmessyapron.com

six 4-ounce servings

  • 1 full vanilla bean (I like Madagascar bourbon vanilla beans) (Alternatively use 1/2 tablespoon pure vanilla extract)
  • 1/4 teaspoon sea salt
  • 2 cups heavy cream
  • 5 large egg yolks, must be at room temperature*
  • 3/4 cup superfine white sugar, separated (regular white sugar will work too)
  • 6 cups water
  • Optional: fresh berries to serve with

Start by splitting the vanilla bean down the center. Scrape out all the seeds and place into a large bowl. Take the vanilla bean pod and place in a small pot with the sea salt and heavy cream. If using vanilla extract, don’t add quite yet to the sea salt and heavy cream.

Heat the heavy cream mixture over the stove until the cream is simmering. Do not boil! Remove from the stove and set aside to slightly cool. Remove the vanilla bean pod. If using vanilla extract, stir it in to this mixture now.

In the bowl with the vanilla bean seeds (or an empty bowl if using vanilla extract), add the egg yolks and 1/2 cup superfine sugar. Beat until the mixture is light, about 2-3 minutes. Meanwhile, place 6 cups of water in a large pot and heat to boiling.

Add about 1/4th of the cream mixture into the egg + sugar mixture. Stir until combined, then pour the remaining heavy cream mixture into the egg + sugar mixture. Stir until combined.

Pour the prepared mixture evenly into the ramekins – use either (6) 4-ounce ramekins, (5) 5-ounce ramekins, or (4) 6-ounce ramekins. Place the ramekins in a metal 9 x 13 baking pan and add boiling water to the pan until the water reaches halfway up the sides of the ramekins.

Bake for 30-35 minutes at 325 F until the centers are barely set (very slight jiggle). Cool completely at room temperature and then refrigerate for 3-4 hours before serving. (These can be refrigerated for 4-5 days before using)

When ready to serve, add the remaining 1/4 cup superfine sugar on top of the custards in equal portions. I find it helpful to use a little more sugar than needed to swirl around on top of the custard to make sure the top is evenly coated with sugar – then just pour the extra sugar onto the next ramekin. Use a kitchen torch to torch the tops until the sugar melts and browns (or even slightly blackens). Top with fresh berries and enjoy immediately 🙂


Triple Summer Berry Buttermilk Bundt Cake

36288139215_e3cb3d31c6_z

This was very tasty and definitely a keeper.

Triple Berry Summer Buttermilk Bundt

www. smitten kitchen.com

Cake
2 1/2 cups (355 grams) plus 2 tablespoons (20 grams) all-purpose flour
2 teaspoons (10 grams) baking powder
1 teaspoon fine sea salt or table salt
1 cup (8 ounces or 225 grams) unsalted butter, at room temperature
1 3/4 cups (340 grams) granulated sugar
Zest of 1 lemon
3 large eggs, at room temperature
1/2 teaspoon vanilla extract
3/4 cup (175 ml) buttermilk
3 cups (350 to 450 grams) mixed berries

Glaze
2 cups (240 grams) powdered or confections’ sugar
Juice of 1 lemon
1 tablespoon (15 grams) unsalted butter, very, very soft

Preheat your oven to 350°F. Generously grease a 10-cup Bundt pan, either with butter or a nonstick spray.* Set aside.

In a medium bowl, whisk or sift 2 1/2 cups flour (leaving 2 tablespoons back), baking powder and salt together and set aside. In the bowl of a stand mixer or large mixing bowl, cream together the butter, sugar and lemon zest until light and impossibly fluffy, about 3 to 5 minutes. Then, with the mixer on a low speed, add your eggs one at a time, scraping down the bowl between each addition. Beat in vanilla, briefly. Add 1/3 flour mixture to batter, beating until just combined, followed by half the buttermilk, another 1/3 of the flour mixture, the remaining buttermilk and remaining flour mixture. Scrape down from time to time and don’t mix any more than you need to. In the bowl where you’d mixed your dry ingredients, toss the berries with the remaining 2 tablespoons of flour. With a silicon spatula, gently fold the berries into the cake batter. The batter will be very thick and this will seem impossible without squishing the berries a little, but just do your best and remember that squished berries do indeed make for a pretty batter.

Spread cake batter — you might find it easier to plop it in the pan in large spoonfuls, because it’s so thick — in the prepared baking pan and spread the top smooth. Bake for 55 to 60 minutes, rotating the cake 180 degrees after 30 (to make sure it browns evenly). The cake is done as soon as a tester comes out clean of batter. At 10 minutes before my baking time was up, a tester was totally wet with batter and I was certain it would never be done in the estimated time. 7 minutes later, the same tester was clean as a whistle, so fret not.

Set cake pan on a wire rack to cool for 30 minutes, before inverting the cake onto a serving platter to cool the rest of the way. Cool completely. Once cool, whisk together the powdered sugar, lemon juice and butter until smooth and very, very thick. (If you’d like it thinner, add more juice, but I like the thick drippiness of it, seen above.) Spread carefully over top of cake, letting it trickle down the sides when and where it wishes. Serve at once or keep it covered at room temperature for 3 to 4 days.* Updated note, due to comments about cake sticking: If you have a nonstick Bundt, just a coat of butter or nonstick spray should do. However, if you have a regular Bundt, not nonstick coated, you’re really going to want to make sure every nook and cranny is well-coated with butter or even shortening (the solidity of both helps them stick to the cake walls), and then dust the inside with flour. Setting your cake pan in the fridge or freezer (to set the coating even further) while you make the cake batter will provide even more insurance. I hope this improves the release rate of the cake!

Scones

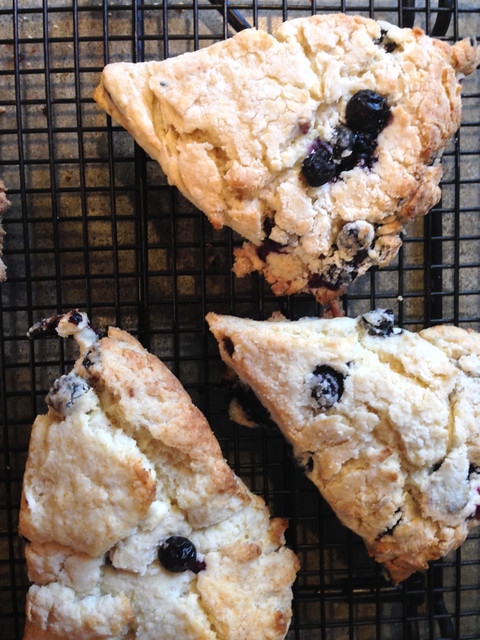
I’ve made scones a few times using this recipe and it’s a keeper. Light on the inside, crunchy on the outside and quick and easy to make.  A bit decadent with the cream but it seems to do the trick.

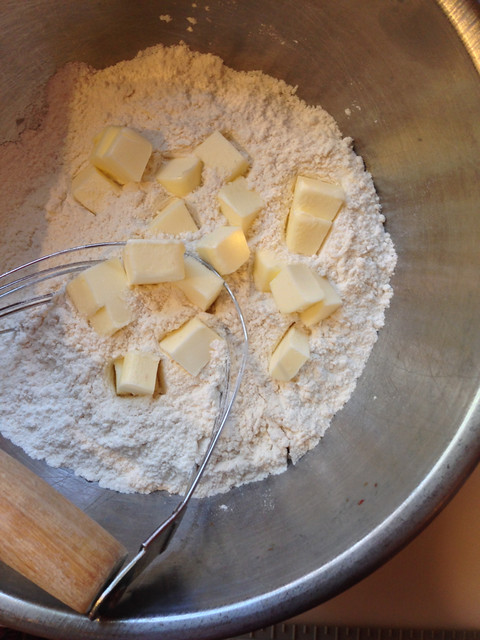
It’s probably easier to do this with the food processor as the recipe calls for but I like using an old fashioned pastry-cutter-in-thingy-do. It is very satisfying.  Plus everyone is still sleeping when I have made these.
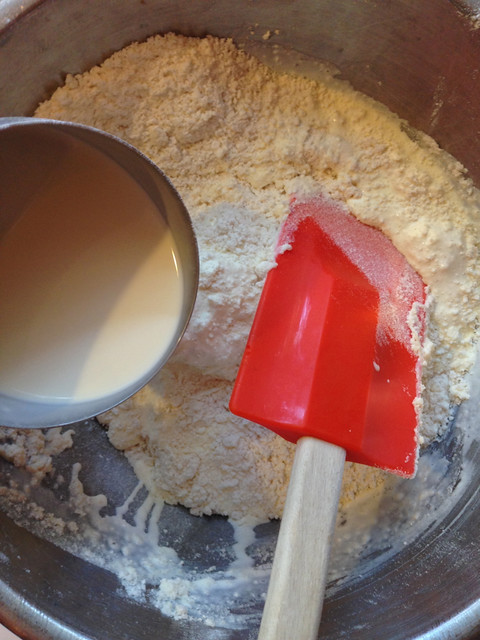
pouring in the cream
et voila

Dreamy Cream Scones
America’s Test Kitchen Cookbook via www.smittenkitchen.com

2 cups (10 ounces) unbleached all-purpose flour, preferably a low-protein brand such as Gold Medal or Pillsbury
1 tablespoon baking powder
3 tablespoons sugar
1/2 teaspoon salt
5 tablespoons chilled, unsalted butter, cut into 1/4-inch cubes
1/2 cup currants (Deb Comments: “I used dried cranberries, and chopped them into smaller bits”, Patrick Comments: I used raspberries once and blueberries once – both were good.  I bet chocolate chips are good… or heath bar bits )
1 cup heavy cream

1. Adjust oven rack to middle position and heat oven to 425°F.

2. Place flour, baking powder, sugar and salt in large bowl or work bowl of food processor fitted with steel blade. Whisk together or pulse six times.

3. If making by hand, use two knives, a pastry blender or your fingertips and quickly cut in butter until mixture resembles coarse meal, with a few slightly larger butter lumps. Stir in currants. If using food processor, remove cover and distribute butter evenly over dry ingredients. Cover and pulse 12 times, each pulse lasting 1 second. Add currants and pulse one more time. Transfer dough to large bowl.

4. Stir in heavy cream with a rubber spatula or fork until dough begins to form, about 30 seconds.

5. Transfer dough and all dry, floury bits to countertop and knead dough by hand just until it comes together into a rough, sticky ball, 5 to 10 seconds. Form scones by either a) pressing the dough into an 8-inch cake pan, then turning the dough out onto a lightly floured work surface, cutting the dough into 8 wedges with either a knife or bench scraper (the book’s suggestion) or b) patting the dough onto a lightly floured work surface into a 3/4-inch thick circle, cutting pieces with a biscuit cutter, and pressing remaining scraps back into another piece (what I did) and cutting until dough has been used up. (Be warned if you use this latter method, the scones that are made from the remaining scraps will be much lumpier and less pretty, but taste fine. As in, I understand why they suggested the first method.)

6. Place rounds or wedges on ungreased baking sheet and bake until scone tops are light brown, 12 to 15 minutes. Cool on wire rack for at least 10 minutes. Serve warm or at room temperature.

Raspberry Angel Food Cake with Raspberry Amaretto Sauce

The New Basics

Make a regular angel food cake mix according to package directions, but fold in one cup of fresh raspberries before pouring into tube pan.

Serve with following raspberry sauce.

  • 2 cups fresh of frozen raspberries, thawed if frozen
  • ½ cup confectioners sugar
  • 1 T. fresh lemon juice
  • ¼ cup amaretto liqueur

Puree the raspberries in a blender or food processor.  Add the confectioners; sugar, lemon juice, and amaretto, and continue to process until smooth.
Strain the sauce to remove the seeds and serve.

Makes 1 ½ cups